Hello! It’s been almost 10 years since my previous post on DevOps. I’ve been busy working on various integrations and Azure infrastructure things at Blackbaud. I’m working to revise this portfolio to bring it up to speed and experimenting with provisioning Azure OpenAI services in Terraform to develop frontends using the AI related APIs. I’ll share an updated passion project demonstrating these findings soon.
Applied DevOps, Chef-gm
Note: This was drafted 2/23/2014 but i’ve decided to publish for historical purposes. DevOps has evolved a lot since this post was written but I believe the goals and purpose are still applicable. – 6/17/2016
As an application developer, I didn’t know much about the emerging philosophy of DevOps but I did know that manually provisioning servers was slow and error prone. My existing development workflow needed an overhaul so I decided to introduce Chef into my team’s workflow to solve the manual server provisioning issue. To my surprise, Chef has a fairly steep learning curve because the best practices are still evolving and it requires knowledge of a wide range of topics. You’ve got things like ruby, chef-solo vs. chef-server, knife, and berkshelf to think about. Here are some thoughts from my first week with Chef to hopefully provide others some perspective and insight into getting started and also show you what is working for me.
My goals with Chef:
- An environment that is reproducible, scalable and testable.
- Automate provisioning of production, staging and development so everything matches as close as possible. No more manual provisioning at the command line or using tools like MAMP.
- Reduce bugs introduced by developing with mismatched configurations.
- New developer project setup time reduced to a few commands.
- Test different server configurations quickly.
- Faster disaster recovery.
- Future scaling opportunities.
I was introduced to Chef when learning about the providers in Vagrant. I initially tried using Vagrant configured with Puphpet and it worked until I tried to share the configuration and it all blew up. After attempting to debug the issues, I decided to learn to configure the infrastructure directly with Chef.
Infrastructure as code solves many of the growing pains I’ve encountered. I’ve created Chef-gm (general manager) as a workflow and boilerplate for developing web applications. Its core is a combination of concepts built on Chef Solo, Vagrant and Knife for getting past the Chef learning curve. The boilerplate is a set of scripted sysadmin tasks that automate your team’s development and production environments. The workflow gives you some practical use cases and encourages further automation. Fork the Chef-gm repository to get started.
Dig South Hackathon #hackcharleston
Last weekend I participated in the Dig South Hackcharleston: Code for the Cause event with my sister as team Apparctica. The overnight hackathon was held during a five day Interactive Festival out of Charleston, SC called Dig South and organized in partnership with The Iron Yard. Ten groups of one to three developers, designers and pitch men assimilated in the TD Arena downtown on Friday evening until Saturday afternoon to compete for the $500 first place cash prize. Groups where randomly assigned to one of six topics based around the needs of the Lowcountry Open Land Trust and were tasked with building a mobile application. Food was provided to the participants in the form of snacks, sodas, energy drinks, Verde wraps, and a mix of PBR and Palmetto Brewing Company lagers. Repositories were managed on Github and are now open-sourced.
The topics that were available:
- Historic Landscapes – Upload images and text of significant historic landscapes and identify what landscape is being reviewed based on location.
- Soul of the Lowcountry – Relate the four core values of SOL and upload photos for each.
- Yelp for the Outdoors – Search outdoor location to identify outdoor activities.
- Land StoryCorps – Tell the story of regional histories of protected properties.
- Merlin for Waterways (Citizen Science) – Maritime, aquatic animals, and flora. Linking waterways with the land.
- Local Food Sourcing – What is available where? Sources and buyers can post where local and organic produce is being sold.
My team was assigned to #6, Local Food Sourcing. Our vision for the idea was that the app would work primarily as an educational tool for lowcountry residents to learn where and when items would be available. The app should list farms, farmers markets, and local groceries with and show which items are season. It should also allow information to submitted for updates.
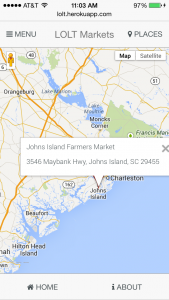
The USDA maintains a database of farmers markets that encourages market owners to submit updates. The USDA farmers market API would be the fastest way to a working dataset for our app while allowing people to update the information through the USDA website.
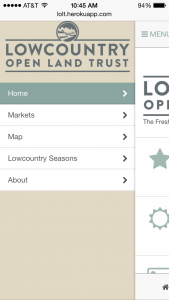
The application we made was developed with an Angular framework called Mobile Angular UI. It provides a boilerplate of basic yet stylish responsive UI elements made with Angular and a subset of Bootstrap. All of the application logic was client side javascript with no backend. The application was built with grunt.js and deployed to Heroku with a basic node.js Express server.
I spent the first half of the hackathon figuring out how to deploy the application which I should have sorted out beforehand. I was focused on this first step because most hackathons won’t qualify your application for competition if it’s not deployable to it’s specifications. Unfortunately this restriction was lifted at the end and became an unnecessary requirement for competition.
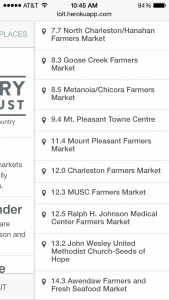
Come crunch time, I didn’t have enough time to sanitize the return data from the farmers market API. You’ll notice that the dataset contains random HTML, returns the distance to the location in the same parameter as the market name, and that the schedule returns a string of spaces when empty. All of these API issues lead to some unusual user experiences.
In the end, we didn’t win the prize but we received all the other benefits of hackathons like friends, food, experience and booze. Until next time, check out what we came up with. And if you’re curious how to deploy a site built with Grunt to Heroku, check out this tutorial :).
Best viewed on a mobile device. lolt.herokuapp.com
Supernova Pop Released in App Store
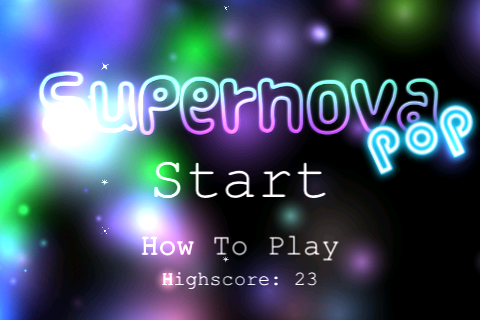
August of 2013 I started developing my first game using Cocos2d at a Hackathon and finally got around to releasing it to the public this weekend. It’s free with ad support on iOS. The game is a simple arcade game that tests your reaction time within an ever expanding universe. Jonathan Mayhak and I would like you to check Supernova pop out in iTunes!
New WXRY-FM 99.3 Playlist
Lately I’ve been building large applications and haven’t had a chance to do any small units of work so when I saw this post on Facebook, I decided it’d be a fun thing to try.
A local non-profit radio station in Columbia, 99.3 WXRY-FM, was looking for a volunteer to make a searchable playlist for their WordPress website. Having been involved with music for a long time and a chance to help a non-profit through programming, I volunteered and built them a new playlist. They had an existing playlist that wasn’t searchable and only showed the last 10 tracks played. So, I whipped up a quick solution that has logged almost 20,000 tracks so far and lets you search for tracks as far back as the implementation date. Check it out the new playlist here.
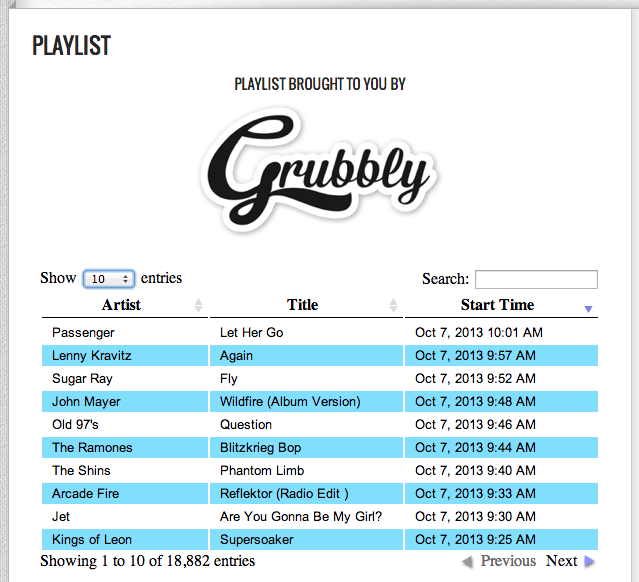
The technical details of the project consist of a WordPress page with an iframe of a jQuery Datatable plugin that loads resources from a remote API hosted on the music server. The API is a modification of the server-side ajax feature of the Datatable plugin. It’s an endpoint that sends back JSON to the page to be parsed. The Shoutcast music server routinely outputs an XML file to the filesystem so I created a cronjob to store the playlist records in MySQL which provides the datasource for the Datatable plugin. The cronjob runs every minute to load the XML playlist, get the last few tracks from MySQL using the timestamps and if they are not stored, store the new track.
The project took about a week in my spare time and was a satisfying unit of work. I’m happy I was able to provide something of value for a non-profit using my programming skill set and not general IT knowledge. In exchange for my volunteer work, the station gave me two tickets to see The Killers. They also let me promote my local food app, Grubbly, on the playlist. I encourage you, if you’re in the Columbia metro area, to check out 99.3 WXRY-FM. Also, try to volunteer every now and then.
Upcoming Development Talk @Refresh Columbia 10/24/13
I’ll be giving a talk at the next Refresh Columbia meeting on October 24th, 2013 at 6:00PM on an introduction to Vagrant and how it relates to other development environments. Developers and designers should benefit from this topical overview.
Tired of spending hours setting up your development environment before you write a single line of code? Vagrant is a tool that makes it easy to get yourself and your teammates ready to develop quickly while providing you with good conventions and best-practices. Developers enjoy the consistent environment and designers enjoy the ease. Come learn about how Vagrant will keep your work environment clean and synchronized with your team.
If you haven’t been to Refresh Columbia yet, you need to come check it out. It’s a great place to learn and network with the design and development community in Columbia. There’s usually food and drink involved. Also, the event is hosted at the new beautiful coworking space in the Vista, SOCO. Please, come hang out with us!
Custom Gaming PC With Apple Thunderbolt Display and Discrete GPU
I recently set out to see if I could build a gaming PC with a discrete graphics card that works with the 27″ Apple Thunderbolt Display. I wanted to know if it were possible and if it would run the recent relaunch of FFXIV. During my research phase, I came across many forums where people would ask if this was possible to do with a pc with a Thunderbolt port. Many people said no and would point out the politics of Thunderbolt, the lack of official drivers or confusion over sharing a connector with the Mini DisplayPort. As it turns out, you can definitely use your Apple Thunderbolt Display with a dedicated GPU with some virtualization magic.
Backstory
First, a little back story. I’ve been genuinely curious about combining an Apple Thunderbolt Display with PC components for some time given that thunderbolt effectively encapsulates PCIe and DisplayPort. It began a few years ago with the prospects of having an external GPU to power my Macbook Air coupled with the Thunderbolt Display to produce a portable and optionally powerful system. From the Thunderbolt Wikipedia page:
Thunderbolt combines PCI Express (PCIe) and DisplayPort (DP) into one serial signal alongside a DC connection for electric power, transmitted over one cable. Up to six peripherals may be supported by one connector through various topologies.
Imagine you were able to have a plug and play GTX 790 for your MacBook. You could leave the external enclosure connected to your display and have an automatic performance boost when you get back to your desk using a single Thunderbolt cable connected to your display. An even more interesting idea is that Apple should consider including a GPU inside the Thunderbolt display to automatically boost the graphic performance of a MacBook Air or Pro. Now that would awesome.
A few companies have shown prototypes of external GPU products for years but none have released a commercial product. However, recently in mid 2013, an individual produced a working setup to achieve an external GPU setup. The steps involved require some moderate hacking, boot process inconveniences, and additional expenses. Since I didn’t already own any PC components, I decided rather than attempt this eGPU build with bootcamp, I’d try to put together a complete gaming PC instead to get better overall performance and flexibility.
Putting It Together
Since there are currently no graphics cards with Thunderbolt out, only mini DisplayPort, we need to get the discrete GPU output through the motherboard’s Thunderbolt port. The trick to getting this build working is that you can virtualize your GPU and run its output through the Thunderbolt port using a piece of software called Lucid Virtu. This software is said to give you additional advantages such higher frame rates, increased Vsync caps and less screen tearing but I haven’t set up a benchmark to test. You’ll need this software to access your discrete GPU from the motherboard.
The steps to get this working are surprisingly easy as long as you follow a few guidelines. First, you’ll need a motherboard that has a Thunderbolt port and has support for Lucid Virtu MVP. The prices on these vary from $200-$500 and stocks seem kinda low. To run Lucid Virtu MVP, you’ll need a CPU with integrated graphics such as the Intel 4000. This is because you’ll need a way to have video out from the motherboard to configure your system since you will not be plugging the Thunderbolt Display into the GPU. Make sure you pay attention to this when choosing a processor or you will not be able to configure Virtu MVP.
After selecting your parts, assemble the computer as you normally would. I initially used a monitor with HDMI plugged into the GPU during setup to ensure everything was running as expected. You may be able to get this setup initially with the Thunderbolt Display if you configure the video output device in the BIOs to use the on board video. I didn’t try the Thunderbolt Display until all motherboard and Intel drivers were installed since I had a monitor connected to the GPU through HDMI.
The disk that comes with the motherboard was my best bet to get going with the drivers and software. Once everything was operating as expected, I rebooted, went to the BIOs, set the default output device to the motherboard instead of PCIe, plugged in Thunderbolt Display and booted. Upon boot, I had audio in/out and video with no effort. I think one of the keys to success is make sure you have your Intel graphics drivers and Virtu MVP up to date. I found this Gigabyte manual useful in knowing how to get the system configured.
Key Parts (~$900)
- Motherboard with Thunderbolt and Lucid Virtu GPU virtualization support
- Modern CPU with integrated graphics like Sandy Bridge and Ivy Bridge Processors
- GIGABYTE GeForce GTX 660 Ti
- Lucid Virtu MVP
- Included with the Gigabyte board and probably the others.
Additional parts
- Apple Thunderbolt Cable
- Samsung 840 Pro 128GB SSD
- Corsair Vengeance 16GB (2x8GB) DDR3 1600 MHz (PC3 12800)
- Corsair PSU
Thunderbolt Motherboard alternatives
FFXIV and Starcraft II
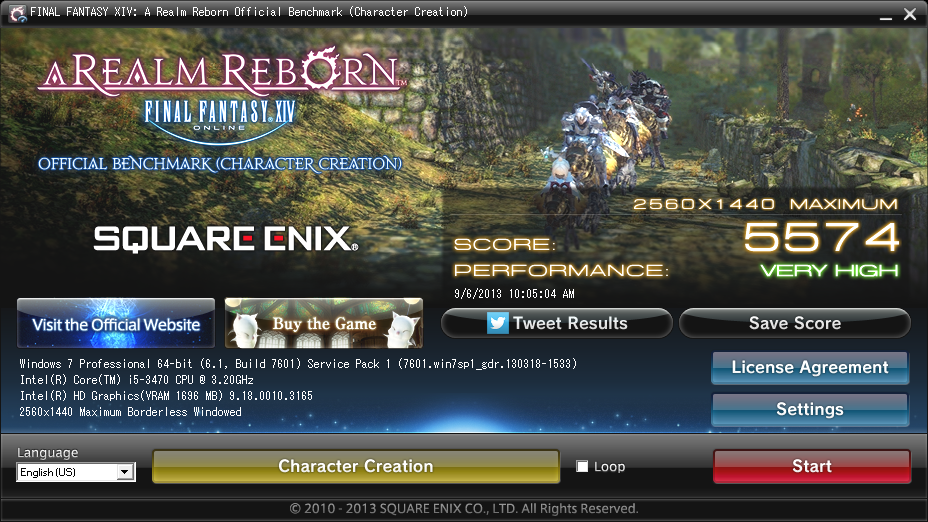
To get FFXIV running optimally, I had to add “ffxiv.exe” to the software list in Virtu MVP and enable borderless windowed mode in-game. After doing this, I consistently get 25-45 FPS with a 2560×1440 resolution on “maximum” or “high desktop” and 40-60 on “standard” with very little tearing. Dropping the resolution to 1920×1080 increases the frame rates by about 50%. Initially full screen mode was giving me some weird artifacts so I found the windowed mode worked best until I found out there was an update from Lucid.
I found the overall result to be very pleasing. Here are the results of the benchmark I ran.
I couldn’t get Starcraft II to start without updating the Lucid software to 2.1.226.x. After doing that It ran at 2560×1440 on Ultra with a solid frame rate of 100+ FPS. Updating also allowed FFXIV to work better in full screen mode.
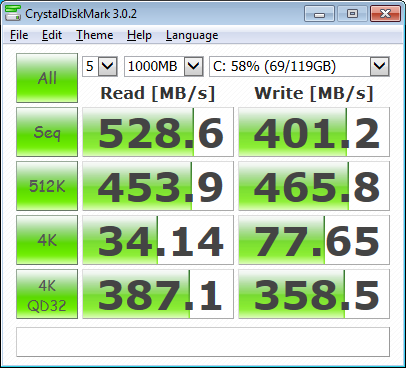
I also found the Samsung 840 Pro 128GB to perform well:
External Thunderbolt Cable
I thought it would be convenient to have one Thunderbolt cable connected to each device to minimize swapping through the built-in cable and the Thunderbolt port on the back. I purchased a cable to run between the PC and the display but it turns out that it has one issue. The Thunderbolt display will pick up the signal from whichever cord is plugged in as long as the last used cable is not still connected. So switching between computers still requires you to unplug the Thunderbolt cable from whichever device you are switching from.
Conclusion
Going forward I’d recommend this build to anyone looking to have the flexibility of a full gaming PC with an Apple Thunderbolt Display. There are a few things that I’ve outlined that could cause a roadblock if you’re not careful choosing your hardware but I’m pleased by the performance that this build gives you with little effort. I’ve had very little issues and have enjoyed numerous hours of game play so far. Remember to update Virtu MVP directly from their website. At this point, the only other things I might try are overclocking and a hackintosh. If I decide to do either, I’ll do a small write up to let you know.
Updates
I found a video from Newegg discussing a similar setup https://www.youtube.com/watch?feature=player_embedded&v=O1t7Rc9qFgI#!
Xdebug breakpoints not working MAMP, PHPStorm
I had an issue with Xdebug not stopping at breakpoints except for the first line of code in only one of my local PHP projects. Strangely enough xdebug_break() still worked everywhere I put it. My first thought was that a PHPStorm project setting with the debugger was awry. After searching and trying many different php.ini settings someone suggested checking the xdebug logs for anomalies.
In your php.in file specify a Xdebug log path file and then restart apache.
- xdebug.remote_log=/[path to where you want the log to live]/xdebug.log
After setting a breakpoint on line 7, running the script, checking the log, and seeing that my breakpoint was being registered, the only inconsistency I saw was the case in the file path.
<- breakpoint_set -i 10 -t line -f file:///Users/na/PhpstormProjects/Sample/httpdocs/index.php -n 7
-> <response xmlns=”urn:debugger_protocol_v1″ xmlns:xdebug=”http://xdebug.org/dbgp/xdebug” command=”breakpoint_set” transaction_id=”10″ id=”429140001″></response><- stack_get -i 11
-> <response xmlns=”urn:debugger_protocol_v1″ xmlns:xdebug=”http://xdebug.org/dbgp/xdebug” command=”stack_get” transaction_id=”11″><stack where=”{main}” level=”0″ type=”file” filename=”file:///Users/na/PhpstormProjects/sample/httpdocs/index.php” lineno=”4″></stack></response>
Turns out this particular project folder name was capitalized and others were not. This was probably a project path setting within PHPStorm somewhere; however, I changed the folder to be all lowercase in the finder and Xdebug began working perfectly.
So if you can’t get a breakpoint to work, check the Xdebug logs and your project path names. Hopefully this saves you from a few hours of frustration.
How to fix a 2006 Honda Civic’s Cruise Control in 30 minutes
I’ve had my 2006 Honda Civic for a while now. I don’t drive as much since graduation because I telecommute so I’ve only got 61,000 miles as of now. For the most part, it’s been good to me. There have been a few recalls that i’ve participated in but I guess that’s what I signed up for with the first iteration of the 8th generation. My biggest complaint that hasn’t been recalled is the bad clear coat paint job which seems to be highly reported on hondaproblems.com for my model year. I’m in the process of taking care of that but for now, my cruise control is finally working again!
Sometime in the past year the cruise control button on my steering wheel stopped working. It’s a mechanical switch that should stay slightly depressed when the cruise is activated. In my case, I could still operate the cruise control if I manually held the cruise button down while driving. That’s not fun so I thought that paying to have this fixed would be less than $100 but the dealership was asking about $250 for parts and labor which seems high to me. With my experience building PC’s over the past decade I decided I could probably handle it myself. Turns out it’s really easy.
I found a website, bernardiparts.com, selling OEM Honda parts and they had just what I needed. They have almost all of the OEM parts that are available when you buy your car and most come with instructions. You can usually find a coupon code by searching online for a discount.
In the process of searching for documentation on my car I came across a forum where someone had documented the process of installing steering mounted audio controls. That post shows you how easy it is to replace the broken switch since it’s so modular. After examining that post and using it as my guide me and buddy of mine did the repair very easily. If you need more pictures, check out those provided in this forum post.
- Disconnect your battery by removing one of the terminal leads.
- Pop off a little 3″ x 1″ panel underneath your steering wheel with flat head screw driver.
- Disconnect the yellow switch by sliding the black release and pulling apart.
- Remove one Torx screw on the left and right side of the steering wheel. These two screws secure the horn switch and airbag to the wheel. They have Loctite® on them so they may require some muscle. Don’t strip them. We used a power drill.
- Remove the airbag by pulling the steering wheel cover towards you while unplugging it.
- Remove the 2 phillips head screws from each spoke behind the wheel. These support the plastic shroud on the front.

- Remove the 4 phillips head screws from the front of the wheel. This will allow you remove the cruise control switch assembly.
- Unplug the cruise control switch assembly.
- Replace the old switch with the new one. If you’ve made it this far, the rest is self explanatory.

- Reverse the process to reassemble the wheel and you’re done.
GeekDesk with Custom Ikea Top Height Adjustable Standing Desk
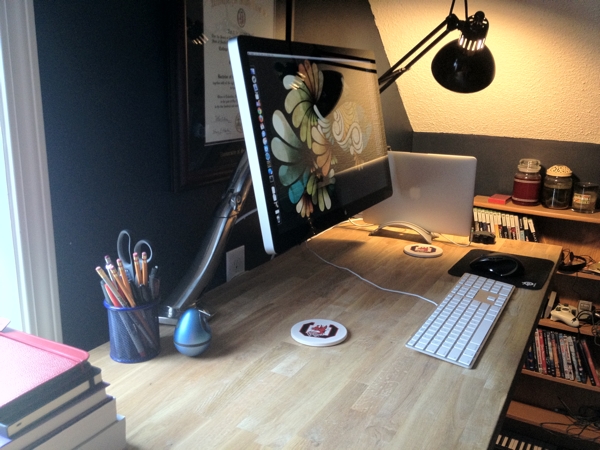
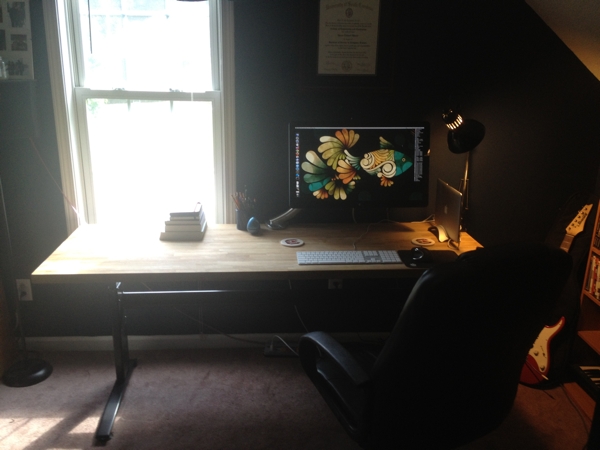
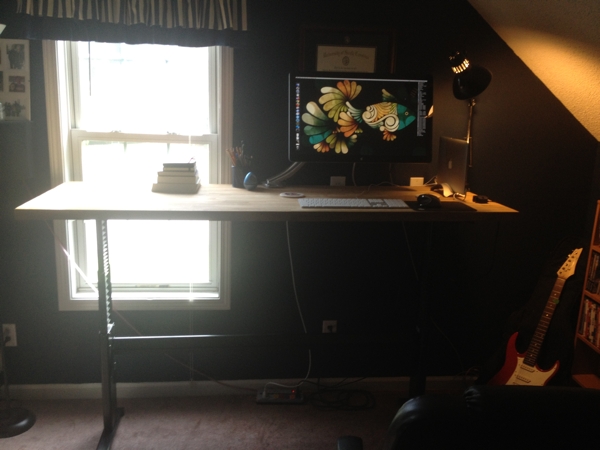
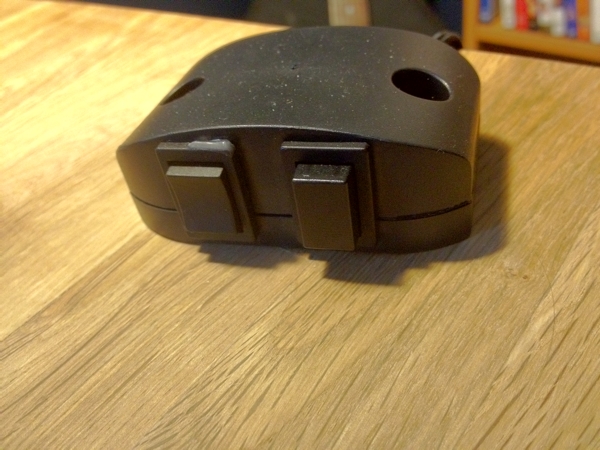
I set out to build a desk that could be height adjusted with the push of a button because I wanted to be able to sit or stand at any given moment. After considering much cheaper and more expensive options I went with a custom GeekDesk build which has worked out perfectly. It arrived fast and was easy to put together. I was impressed by the build quality and the instructions.
http://www.youtube.com/watch?v=4mImFEOAllk
GeekDesk sells the frame without the top so I decided to go the custom route and find my own. After looking through DIY sites I found out about the Ikea countertops. They have many options including the solid oak butcher’s block which I chose. The countertop comes with a light factory finish that I’ve decided is good enough for now. Also, the countertop size complements the frame size perfectly. I was concerned that the frame wouldn’t be able to lift the hardwood with my electronics but it has performed like a champ.
The desk pieces cost about $800. I use it 50+ hours a week and have loved the ability to sit or stand at any given moment. I can’t imagine not having that luxury now. I’ve found that it’s helped with fatigue and for getting in the zone. Also, the extra space is great for reading and writing or setting up another computer. I highly recommend this setup if you’re looking for a sit stand option.
I added a few extras to my workspace to give me a little more room.
Desk Components
- GeekDesk v2 large black frame only; 65″ width; (There’s a newer frame now)
- Ikea NUMERÄR Oak Countertop; 73 1/4 x 25 5/8″

